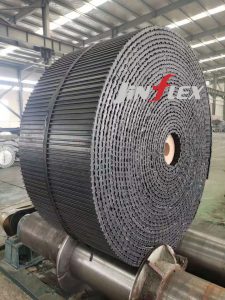
The installation steps of conveyor belt can vary according to different conveyor belt types and specific working environment, but can be roughly divided into the following main steps:
I. Preliminary preparation
1. Confirm the stability of the frame: Ensure that the frame of the conveyor is stable, the diagonal length is consistent, and the brackets of each component are not deformed.
2. Clean the working environment: Clean the workplace and ensure that the ground is flat and there are no sharp objects or obstacles.
3. Check the equipment components: Carefully check the cleanliness and integrity of components such as rollers and pulleys, and remove foreign matter.
4. Adjust the tensioning device: Verify the mobility of the tensioning device and adjust it to the shortest state for easy installation.
II. Install the conveyor belt
1. Set up the belt roll:
o Put on a flexible shaft on the conveyor belt winding core and set up the belt roll.
o Before putting it on the rack, pay attention to the direction of the upper and lower cover rubber not to set it up in reverse.
o In places where it is not convenient to set up directly, the conveyor belt roll can be unfolded, and ensure that the folding area has a large enough radius of curvature to avoid damage to the conveyor belt.
2. Connect the old and new conveyor belts (if replacement is required):
o If the conveyor belt needs to be replaced, the new belt can be connected to the old belt, and the belt can be unloaded and installed at the same time.
3. Cut the old conveyor belt (if applicable):
o For horizontal conveyors, the old conveyor belt can be cut at any point.
o For conveyors running in an inclined direction, the cutting point must be selected to prevent the belt from sliding down due to its own weight and losing control.
4. Place the new conveyor belt:
o Place the new conveyor belt correctly on the conveyor and fix one end with a clamp.
o Pass the conveyor belt around the roller and pulley, and install the conveyor belt smoothly in place through the traction device.
o Prevent the conveyor belt and the frame from squeezing each other during traction.
5. Adjust the tension:
o Use the tensioning device to adjust the tension of the conveyor belt until the conveyor belt does not sag significantly on the return roller.
o Fix the tensioning device at an appropriate distance from the starting point (such as 100~150mm).
3. Connection and debugging
1. Connect the conveyor belt:
o Select the appropriate connection method (such as mechanical connection, cold glue connection or hot vulcanization connection) to connect the conveyor belt according to the needs.
o Pay attention to the applicability and operation points of different connection methods.
2. No-load test run:
o After all parts are installed, perform no-load test run.
o Check whether the chain plate or conveyor belt is running normally, whether the tension is stable, and whether there are abnormal sounds and vibrations.
o If necessary, make fine adjustments to ensure smooth operation of the equipment.
3. System connection and electrical control:
o Accurately connect the conveyor with upstream and downstream equipment.
o Carry out electrical line connection and control system debugging to ensure the linkage and coordination of the entire production line.
4. Safety facilities and improvement
1. Install safety protection devices:
o Install safety protection devices such as emergency stop buttons and limit switches.
o Provide relevant training for operators to ensure safe production.
2. Final acceptance and handover:
o After multiple inspections confirm that the installation quality meets the requirements of the specifications, complete the final acceptance and go through the handover procedures.
o Perform necessary inspections and adjustments before formal use.
The above steps are for reference only. The specific installation steps may vary depending on the type of conveyor belt, working environment and specific requirements. In actual operation, adjustments and optimizations should be made according to specific circumstances.
